Tuesday 2 August 2016

Collioure painting


This painting was done all the way back in May but had to stay hush hush as it was a present for my sister's first wedding anniversary commissioned by her husband. Somehow, despite not telling my mum about the painting I was doing, she still managed to let slip to my sister a couple of days before.. oops!

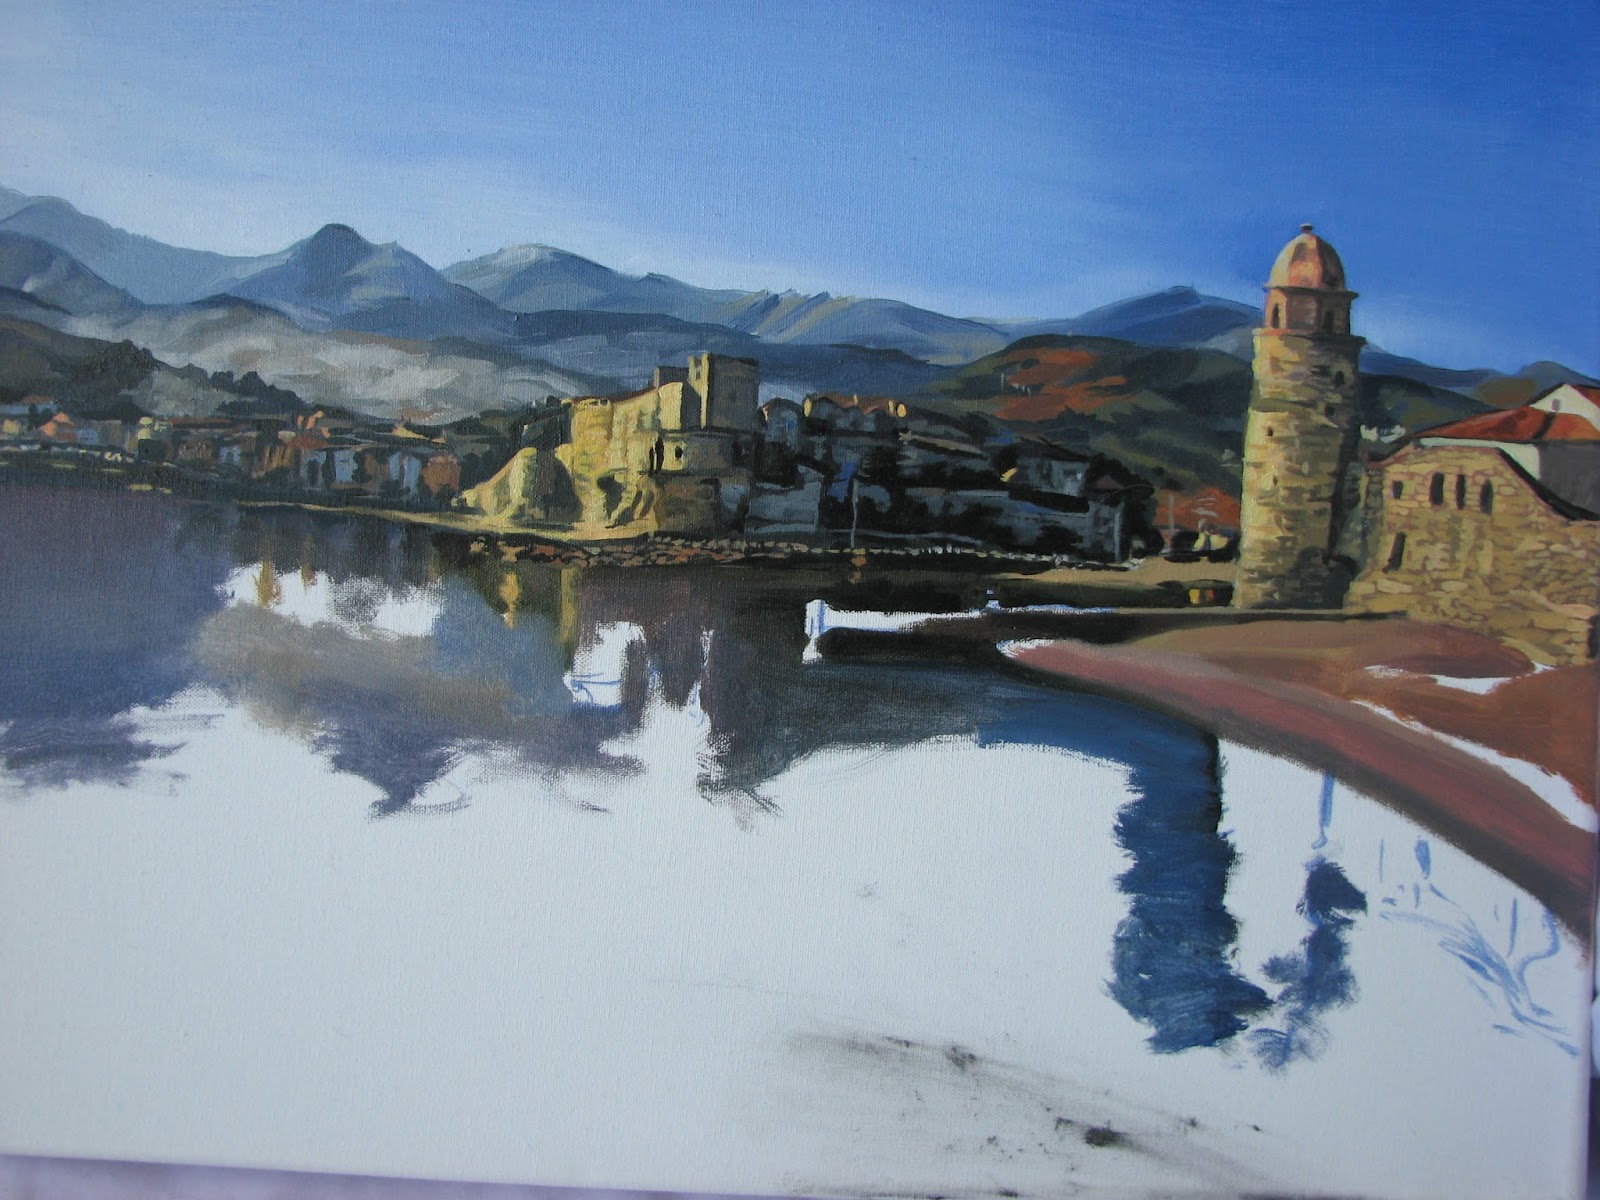
It's something very different from my usual wildlife and pet pictures, a landscape of Collioure - a seaside town in the south of France where they spent their honeymoon. The first anniversary is paper which gave my brother-in-law the idea for a painting gift. It was done in a looser style than I usually work, focussing on the light and colour to give more of an impressionist piece.

Here are the stages of the painting:


Wednesday 18 May 2016

Minky Portrait


Here are the the stages I went through of my latest painting of Minky the cat.

STAGES

Sepia wash after line drawing
Working on the base tones
The background is worked in and the lighter tones are slowly added
Darks are worked across the painting
Adjusts are made and the whiskers are finally added

Sunday 10 April 2016

Great Northern Diver Painting

The great northern diver is a bird I've seen just the once whilst on holiday in Iceland. They do visit the UK but only really in the northern parts of the country in the winter when they aren't in their handsome looking breeding plumage.
 
A pair of courting divers
It's a bird I've been wanting to paint since I've started oil painting but have put off until now as it's patterns and colouration are complex mix of spots, checkering, stripes, and with a 'metallic sheen' on the neck and head of the bird. So I wanted to make sure I'd be able to do it well enough for my liking.

First I sketched out the position of the bird in sepia and then did a couple of layers of background colour using a fan brush for softness and opacity.

Then I worked further on the background bringing in the colours of the ripples up to the bird. This was followed by washing in the base colours of the bird and building up the opacity of that. The great northern diver naturally has dark red eyes and at this early stage with the lighter washes it was looking pretty demonic!


After that I started to build up the opacity and shades into the bird. 


Then I began detailing the bill and the eyes (so it looked less possessed). The neck and head was given a greyscale toning to it so I could glaze in colour which I thought may help give a metallic look to it


I moved onto working on the markings of the feathers and started adding the dark and bluer ripples in the foreground water and the water droplets on the bird's head.


The glazing of colour into the neck and head then took place and I worked on the more abstract looking ripples of the bird's reflection. The foreground water was also gradually build up with various shades.


The colour glazing continued on the neck and head and the final lighter tones added into the ripples to complete the painting.


Saturday 26 March 2016

'Dragonfly' painting

.. well a banded demoiselle really but that's close!

Apologies for the long break between the last blog post until now. I have been very busy of late and also found myself a bit burnt out so needed a break from wildlife painting. but now I'm back and have been working on two of them. One of which is now finished.

I hadn't painted an insect in a while and was going through my college work where I had done quite a few and I decided to make use of a photo I took when I was at Hothfield Heaths nature reserve of a female banded demoiselle. Females are greenish with copper tinted wings where as the males are blue bodied with clear wings with black 'bands' near the ends; hence the name.

I planned out my painting with an initial sketch of the damselfly and thistle in burnt sienna before then working on the background, trying to retain the sketch for when I paint them later. The background was done in two layers using a fan brush to produce a softer look.


I then moved on to work on the thistle, working with a base colour wash and adding increasing highlights and shadows as I go.


I use this same method on the damselfly, here you can see the initial dark wash on the body.


Once the dragonfly was blocked in I then added some details in the eye and thorax and highlights to the legs. The thorax is mainly done in greyscale so I can glaze in colour as there is a metallic sheen to the insect which my standard colours would struggle to bring out.


Colours are glazed along the body and I tint the wings copper before then adding the veining on them and start working on all the colours in the wing highlights of which there are gold, green, blue, pink, and copper.

I add white and again glaze colour into the insect to help bring out the colours and add the final details to the wings.

I hope you like my portrait.


Sunday 10 January 2016

Ocelot Painting complete

It's been a while, mostly spent waiting for the painting to actually dry, but the ocelot painting is now finished!

So here's a bit of a refresher as to where the painting got to last time:

I had roughed out the greyscale underpainting ready to begin glazing in the colour. 

I started off putting the yellows in the ocelot fur along with bluer tones in the white furs. This gave the image a temporary strange green-tint to it.
Then I began putting the warmer brown tones into the fur and the pinks into the nose and ears. And, generally, just building up the colour intensity on the painting. At this point the colour started to look very flat so I worked a white fur layer back into the image and the texture of the nose. 

I tinted this with thin glazes of brown and repeated the process. Finally I added some bluey shadows to the whiskers and added some dark shades to the ocelot and background (the latter is what took so long to dry).


Here's the final outcome albeit with still a little glare that I've mostly edited out as it's so hard to photograph a shiny dark painting. I'm pretty happy with how the glazing of the colour went. The painting is in a chiaroscuro style - I've been re-learning my art terms recently, can you tell? ;) -  this is where a strong contrast between light and dark is used to convey a more dramatic image. It was particularly used in the Baroque art period by the likes of Caravaggio and Rembrandt, who's artwork I particularly liked. 

I would have liked my mark-making to be better than it was but was hampered somewhat by my photographic reference which was unfortunately a little blurred and obscured. I also need to get a couple of new brushes as my fine ones are wearing thin which makes fine details harder to put in. But the main concern I had with painting this way with colour glazes is that I wouldn't be able to build up enough depth of tone and colour and I think it turned out very well on that front.

I hope you like it.

Friday 1 January 2016

Widlife Watch: Mistletoe

Mistletoe is an odd plant. It's evergreen and grows in the crowns of broad-leaved trees such as apple, lime, hawthorn, and poplar. The plant is actually hemiparasitic on the trees it grows on and uses roots called haustorium to both attach itself to trees and to draw nutrients and water from them. The native mistletoe to the UK is Viscum album - it has rounded simple spatula-like leaves and spherical translucent white berries. The berries have sticky juice that was used to make a glue in the past to catch birds.

Mistletoe is a plant very much associated with this chilly time of year along with holly and ivy. It's often used in Christmas decorations and has been important in past European customs, legends, and religious ceremonies. Kissing under the mistletoe is a long-running tradition, the first evidence of which comes from England back in the 16th Century. In pre-Christian Europe mistletoe was seen as as a symbol of divine male essence and was associated with romance, fertility and vitality and used in ancient Celtic rituals. In fact mistletoe is still a part of modern day druid ceremonies. 


Speaking of which, I headed out for a walk with friends just a couple of days before the winter solstice to visit the Coldrum long barrow - a Neolithic tomb. By chance we stumbled upon a druid ceremony taking place. Solstice observances involve the celebration of the end of the darkening days as from this point the days begin to lengthen towards the summer. As part of their ceremony they took cuttings from mistletoe. They offered some to us telling us that the mistletoe had yet to touch the ground and to plant it and make a wish for the new year.

And with that in mind:

Happy New Year!

Sunday 29 November 2015

Ocelot Painting So far..

So this is the first time I've attempted a grisaille painting method on a wildlife painting. I'm currently working on the tonal greyscale painting and then I'm going to glaze in the colour later. Here are the first three stages:


In the first stage I use diluted paint to sketch out the ocelot on the canvas along with a quick wash of the background.
Once this was dry I roughed out the base tones of the ocelot along with the markings. This stage actually took forever to dry so in future I'm thinking of adding a little liquin to the paint I'm using. Liquin is a thin medium which is added to paint for glazing but which also speeds up the drying time of paint.
This is where the painting is at following the second layer of paint. The aim at this stage was to make sure the background is dark and that the base tones, shapes, and markings of the ocelot are done to where details can then be worked in. Generally this will mean the lightest highlights and darks will not yet be present and the tones themselves are a couple of shades darker so I can put in the lighter fur details later.